> ## Documentation Index
> Fetch the complete documentation index at: https://docs.step1.dev/llms.txt
> Use this file to discover all available pages before exploring further.
# Quick Start
> A step-by-step onboarding guide made just for you.
Step1.dev lets you clone any website pixel-perfectly in seconds—or import your own existing site. From there, use AI to modify anything through natural language, fuse in designs from any other website with Magic Fusion, and publish with one click when you're ready.
## 1. Create a Project
Whether you have a reference site in mind, want to continue developing an existing site, or are starting from a blank slate—Step1.dev supports three ways to get started:
Click clone on any website and get an exact copy in seconds—looks and feels identical to the original.
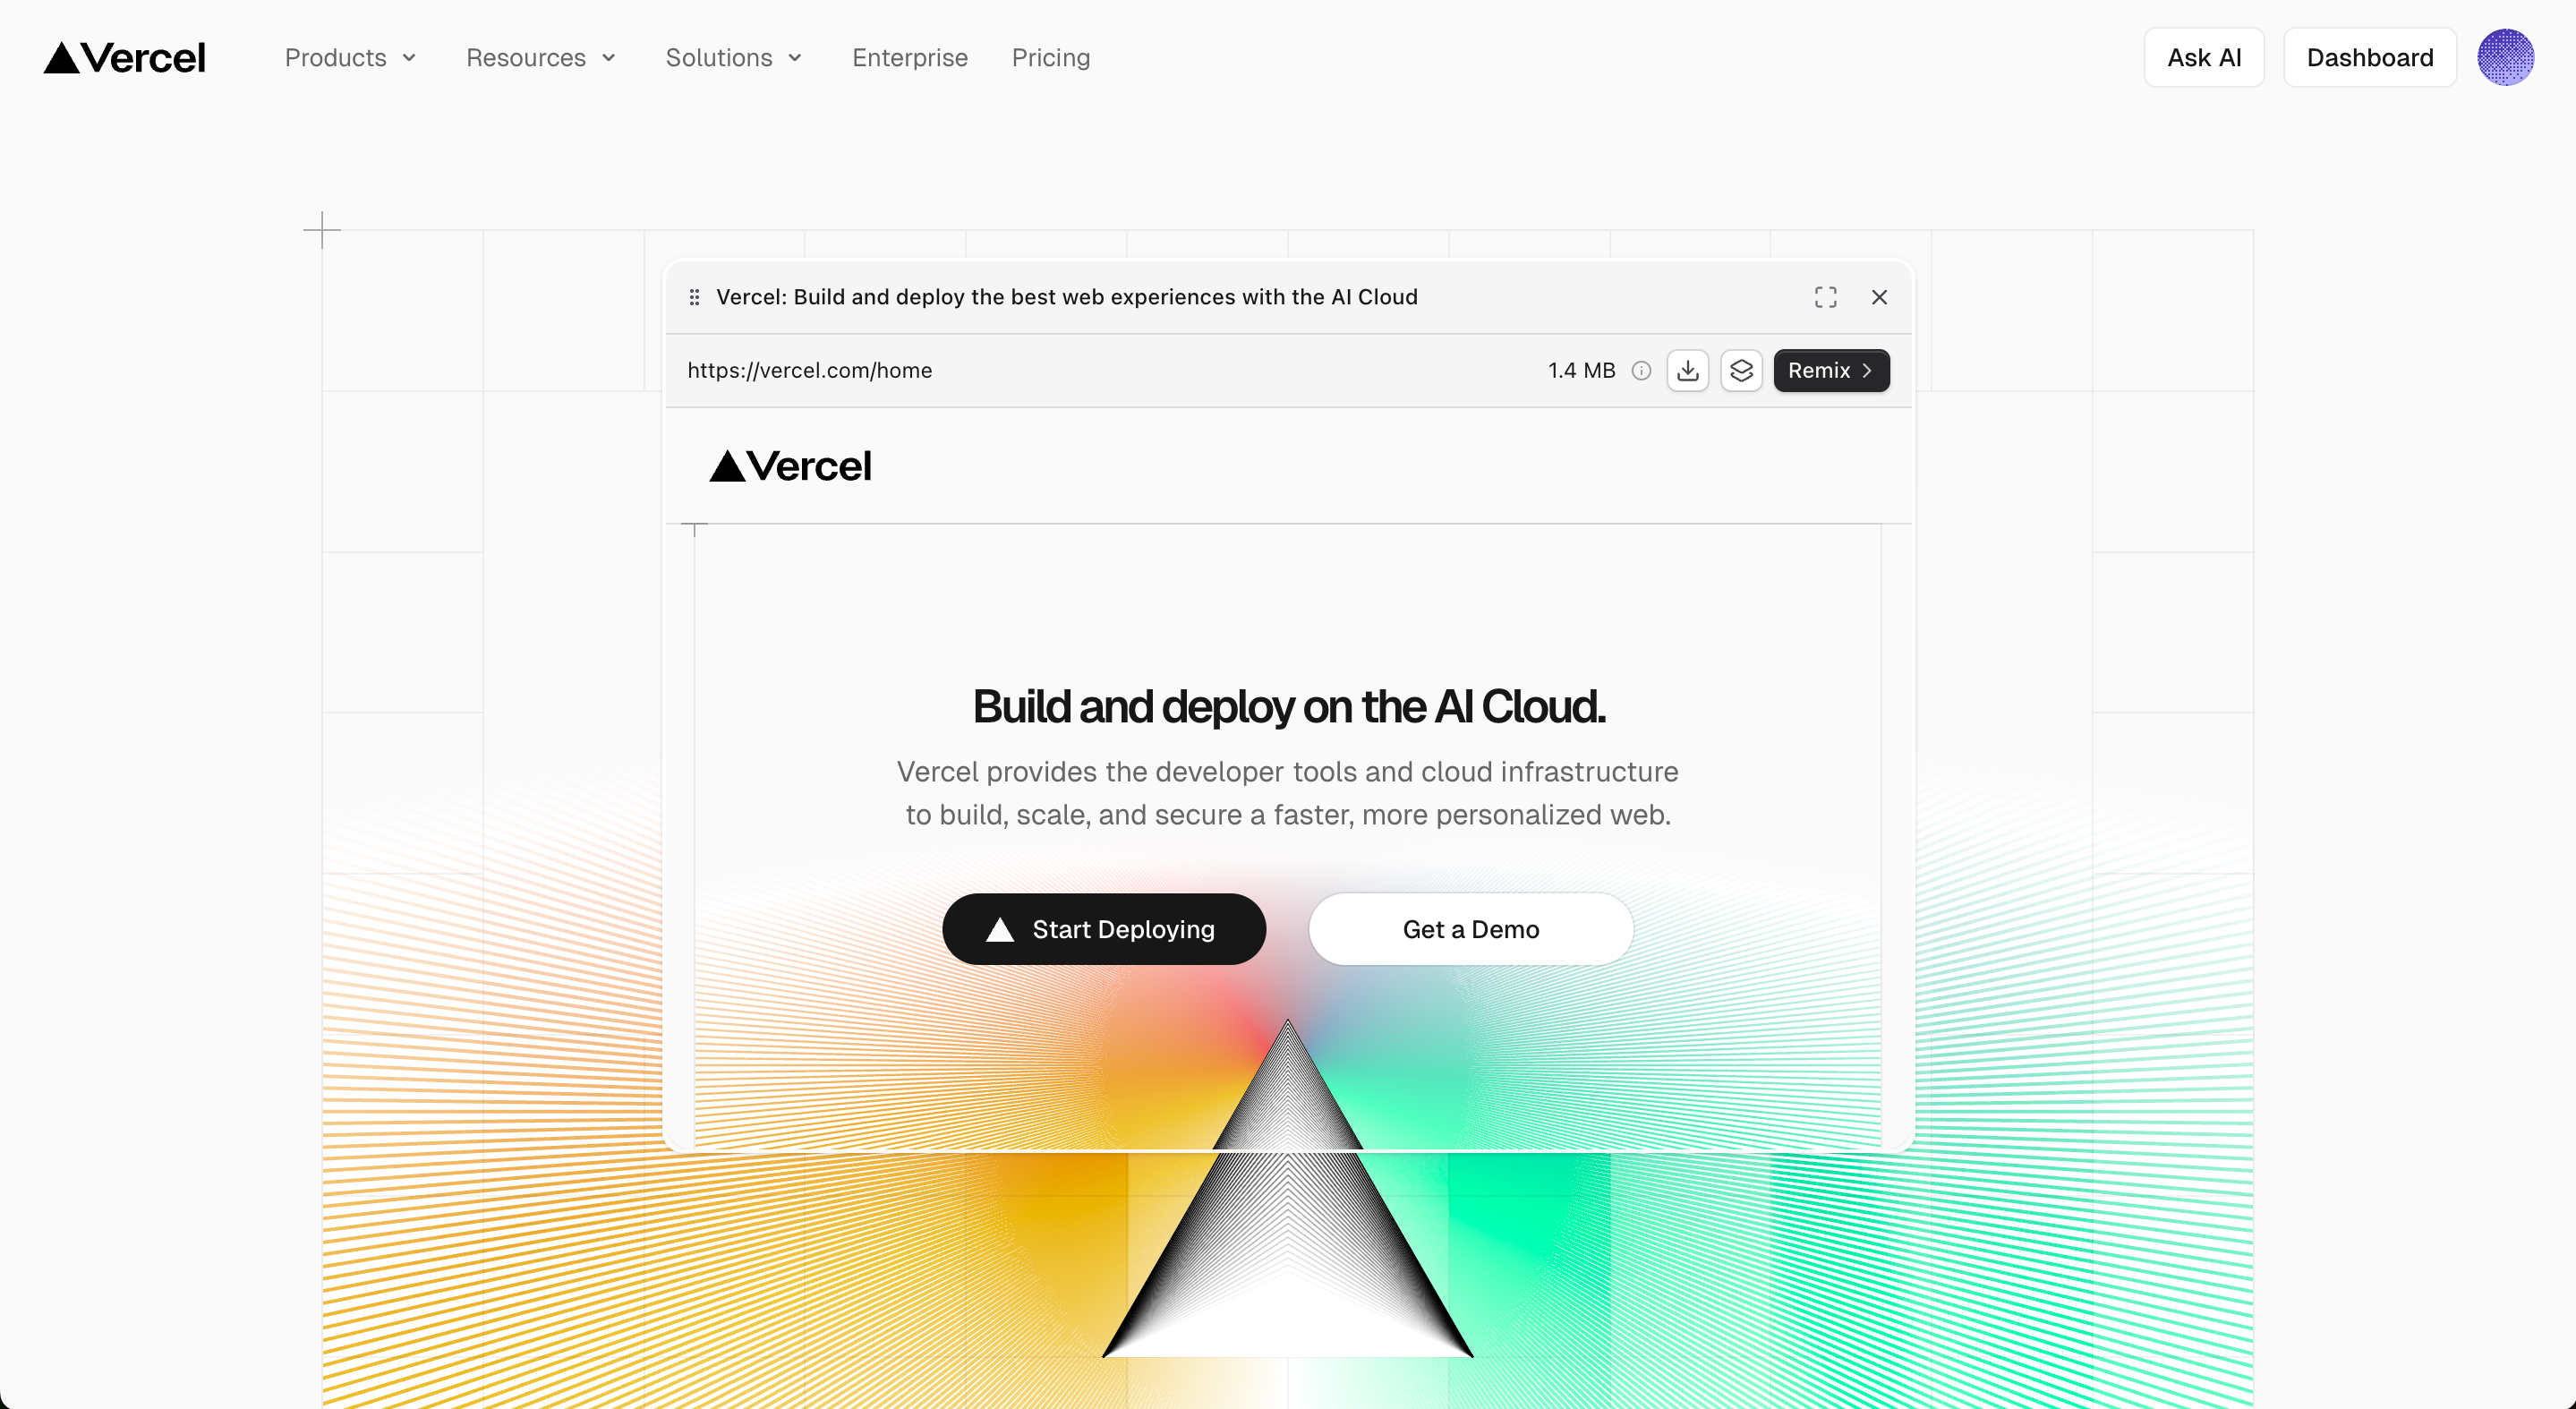 Install the Step1.dev extension from the Chrome Web Store. Once installed, the icon appears in your browser toolbar.
Get it free on the Chrome Web Store
Open the site you want to clone. Click the Step1.dev extension icon and select **Clone this page**.
Step1.dev analyzes the page and opens it in the editor automatically. Your cloned version is ready instantly.
Describe your changes in the AI chat—swap out the logo, update the copy, change the colors, or add new sections.
Example: "Replace the navbar logo with ours, update all copy to match our brand, and change the primary color to deep blue."
**Best for:**
* Using a competitor or reference site as a design starting point
* Client sends a reference → clone → swap brand content → deliver
* Upgrading the look of sites generated by v0 / Lovable / Bolt
Bring your current website into Step1.dev and keep building on top of it—no need to start over.
Install the Step1.dev extension from the Chrome Web Store. Once installed, the icon appears in your browser toolbar.
Get it free on the Chrome Web Store
Open the site you want to clone. Click the Step1.dev extension icon and select **Clone this page**.
Step1.dev analyzes the page and opens it in the editor automatically. Your cloned version is ready instantly.
Describe your changes in the AI chat—swap out the logo, update the copy, change the colors, or add new sections.
Example: "Replace the navbar logo with ours, update all copy to match our brand, and change the primary color to deep blue."
**Best for:**
* Using a competitor or reference site as a design starting point
* Client sends a reference → clone → swap brand content → deliver
* Upgrading the look of sites generated by v0 / Lovable / Bolt
Bring your current website into Step1.dev and keep building on top of it—no need to start over.
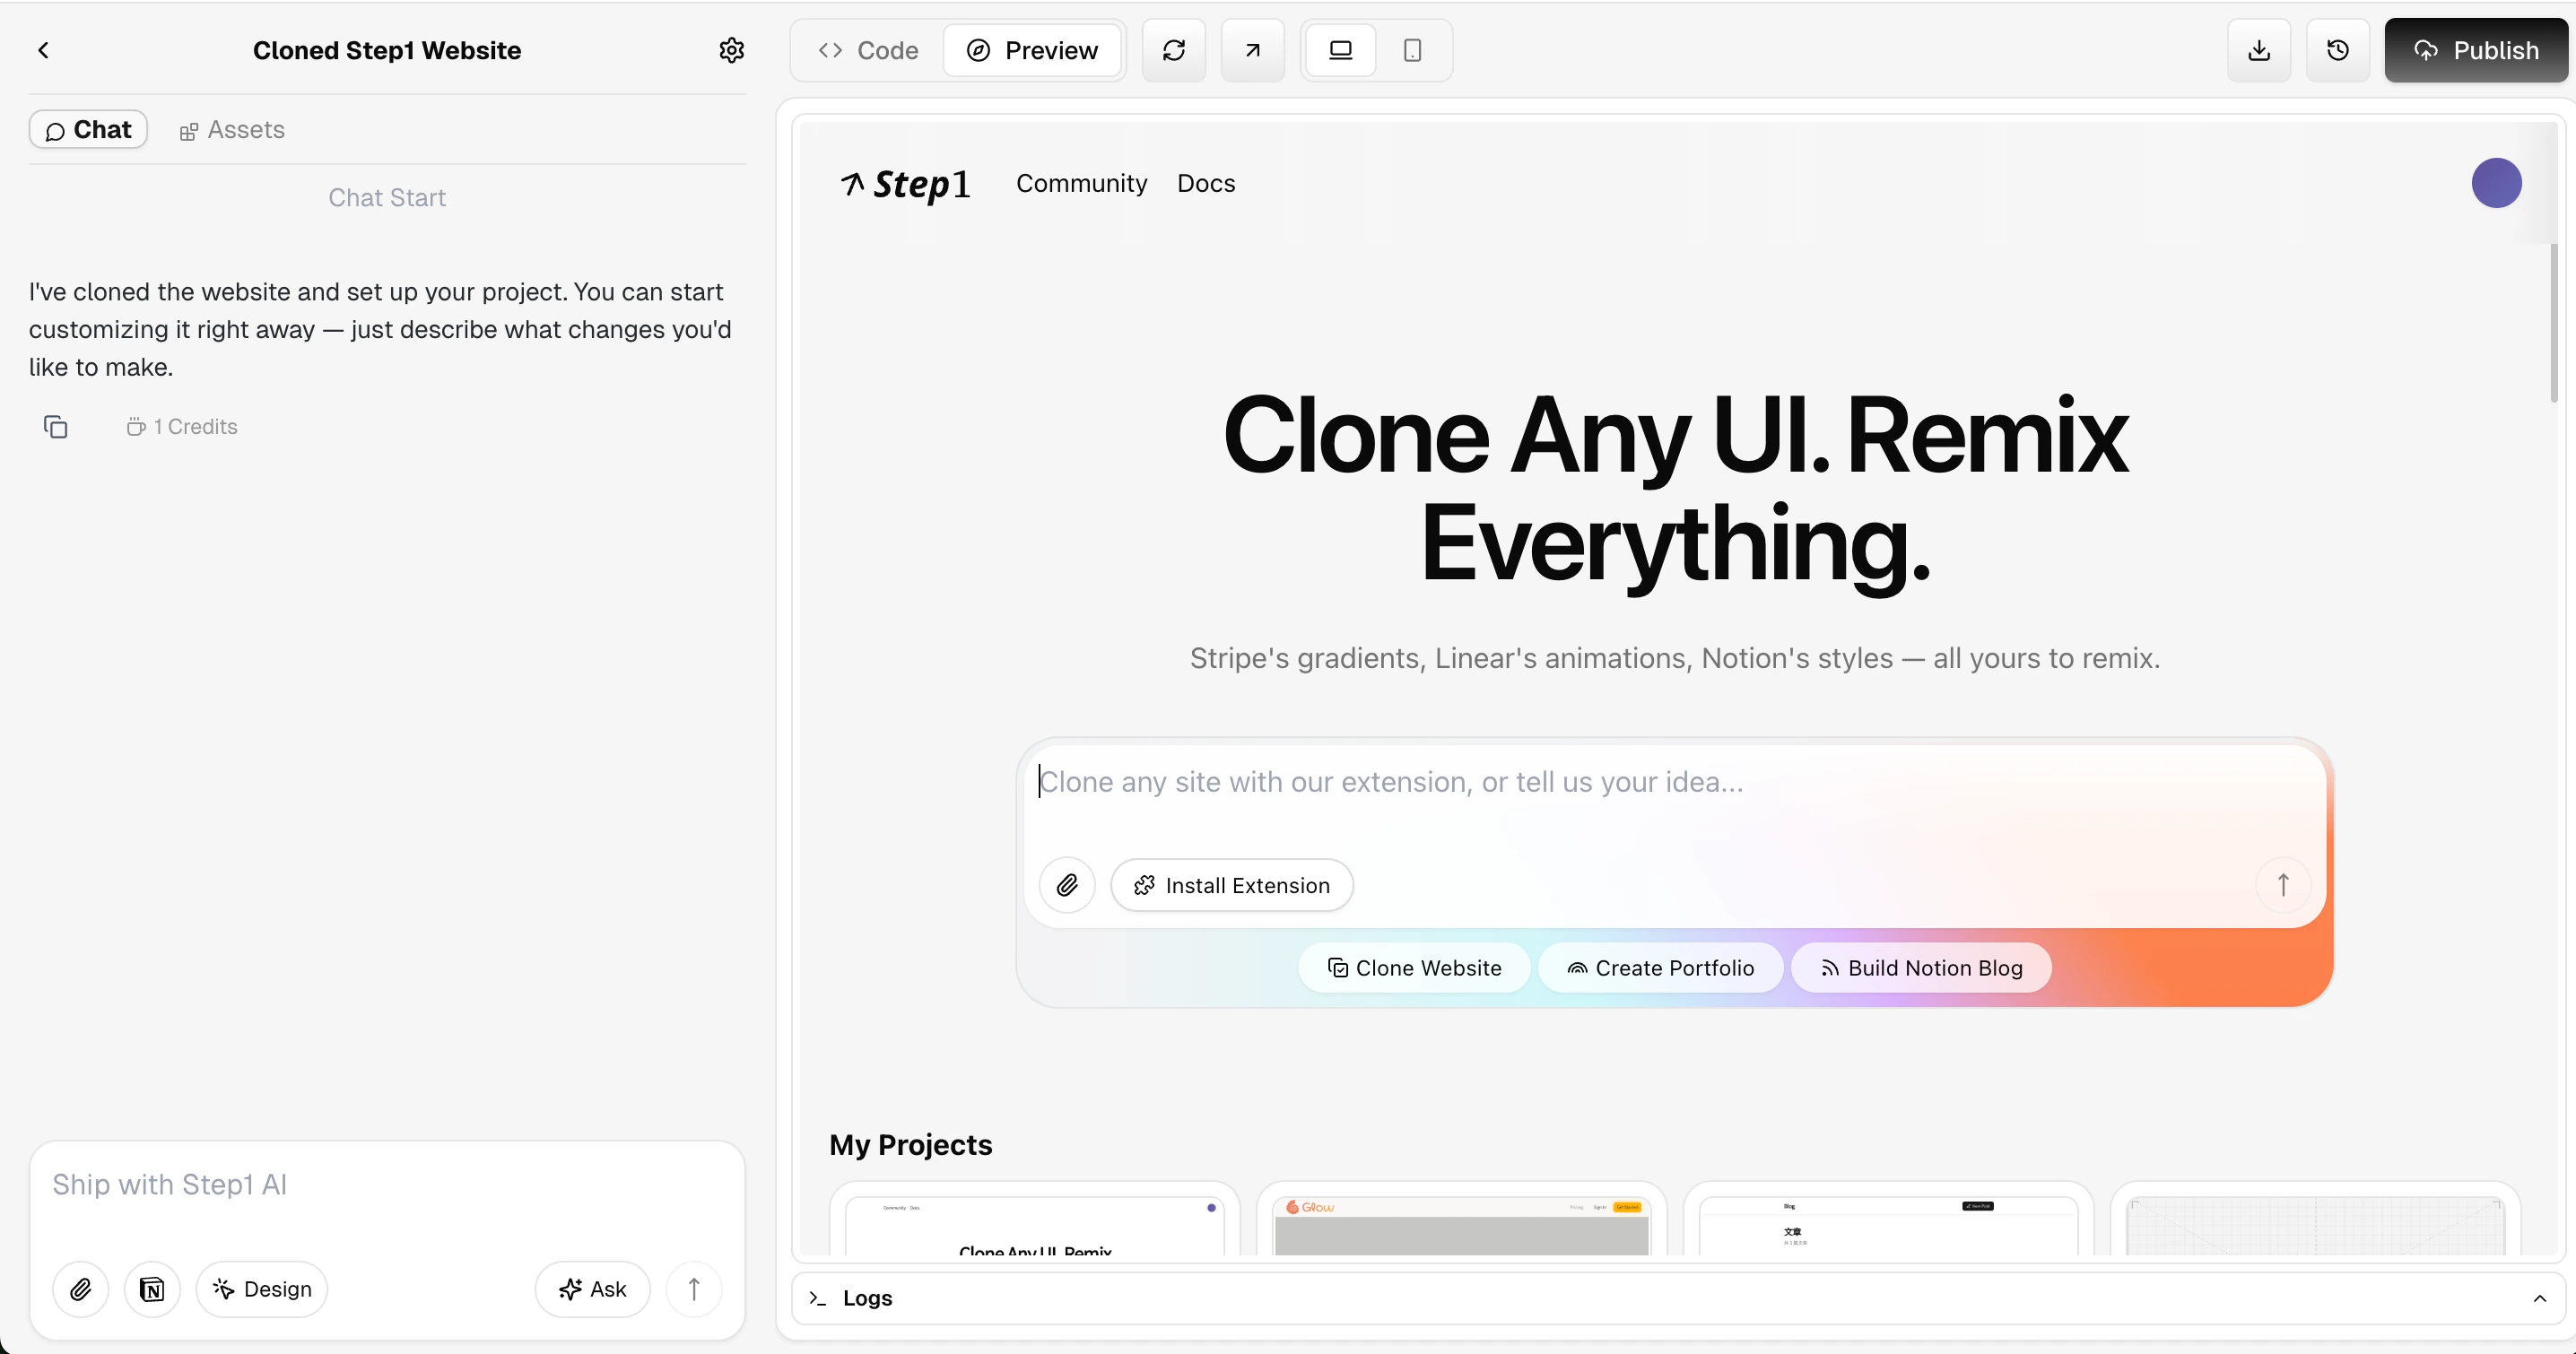 Navigate to the site you want to continue developing.
Click the Step1.dev extension icon and select **Clone this page**. The page imports into the editor automatically.
Modify, extend, or redesign any part of the page using natural language.
Example: "Keep the overall layout. Change the card section to three columns and add a hover animation."
**Best for:**
* Redesigning or upgrading an existing site
* Importing an older site to fuse in new design elements
Only the visual UI is imported—no functionality, logic, or interactions are carried over.
Describe your idea in natural language and Step1.dev builds the site for you.
Navigate to the site you want to continue developing.
Click the Step1.dev extension icon and select **Clone this page**. The page imports into the editor automatically.
Modify, extend, or redesign any part of the page using natural language.
Example: "Keep the overall layout. Change the card section to three columns and add a hover animation."
**Best for:**
* Redesigning or upgrading an existing site
* Importing an older site to fuse in new design elements
Only the visual UI is imported—no functionality, logic, or interactions are carried over.
Describe your idea in natural language and Step1.dev builds the site for you.
 Type your vision into the prompt on the homepage:
Examples:
* "Create a SaaS landing page with a feature section, pricing table, and FAQ."
* "Build a minimal personal portfolio with project showcases and a contact section."
**Tips:**
* The more specific your description, the better the first result
* You can always refine through conversation after the initial generation
* Combine with Magic Fusion to elevate the design by borrowing from sites you love
## 2. Magic Fusion
Pull design styles or elements from any website and blend them into your project—just point, click, and describe what you want.
In the **Assets** panel on the left side of the editor, find the reference page you've collected (e.g., the Raycast homepage). Click the **Fusion** button on that asset card.
The **Magic Fusion** window opens with the full reference page. Hover to highlight any section with a **blue outline**, then click to select it—it turns **green**.
You can select a single element (a button group, animation, etc.) or an entire page section.
Click **Fuse Selection** to return to the editor. In the AI chat, describe where to place it and any adjustments you want.
Example: "Add the button group I just selected below the Hero section. Keep the animation but change the color to our brand primary."
The **Fusing Element** indicator appears. AI blends the selected design into your project, automatically matching your existing style.
Magic Fusion works at any level of granularity—from layout and visual style down to micro-animations. Just describe what you want in natural language.
* **Component Fusion**: Select a specific element and blend it into your project
* **Full-page Fusion**: Migrate the overall look and feel of a reference site into your project
* **One-click Style Switch**: Let AI switch your entire project's visual style to match a reference page
* Fuse Stripe's gradient effects into your landing page
* Apply Linear's animations to your product showcase
* Use Notion's clean layout for a documentation site
* Transfer Glossier's brand feel to a client's skincare site
***
## 3. Refine Your Project
Click the **Design** button in the bottom-left to visually select and precisely edit UI elements.
Click any element to edit it directly
Just describe what you want. Step1.dev handles the rest.
Example: "Polish the UI—clean, modern, and intuitive, similar to Notion's style."
Upload images directly in the chat and describe how to use them. Step1.dev adds them to your project automatically.
Example: "Add this image as the homepage background."
Not happy with a recent change? Click the button at the top-right of the chat, or the `Restore code` button below any message, to go back to a previous version.
Not sure how to approach something? Switch to Ask Mode to get suggestions without changing anything in your project.
* Click the `Ask` button in the bottom-right of the chat
Example: "How can I add drag-and-drop to reschedule calendar events?"
***
## 4. Deploy & Publish
Type your vision into the prompt on the homepage:
Examples:
* "Create a SaaS landing page with a feature section, pricing table, and FAQ."
* "Build a minimal personal portfolio with project showcases and a contact section."
**Tips:**
* The more specific your description, the better the first result
* You can always refine through conversation after the initial generation
* Combine with Magic Fusion to elevate the design by borrowing from sites you love
## 2. Magic Fusion
Pull design styles or elements from any website and blend them into your project—just point, click, and describe what you want.
In the **Assets** panel on the left side of the editor, find the reference page you've collected (e.g., the Raycast homepage). Click the **Fusion** button on that asset card.
The **Magic Fusion** window opens with the full reference page. Hover to highlight any section with a **blue outline**, then click to select it—it turns **green**.
You can select a single element (a button group, animation, etc.) or an entire page section.
Click **Fuse Selection** to return to the editor. In the AI chat, describe where to place it and any adjustments you want.
Example: "Add the button group I just selected below the Hero section. Keep the animation but change the color to our brand primary."
The **Fusing Element** indicator appears. AI blends the selected design into your project, automatically matching your existing style.
Magic Fusion works at any level of granularity—from layout and visual style down to micro-animations. Just describe what you want in natural language.
* **Component Fusion**: Select a specific element and blend it into your project
* **Full-page Fusion**: Migrate the overall look and feel of a reference site into your project
* **One-click Style Switch**: Let AI switch your entire project's visual style to match a reference page
* Fuse Stripe's gradient effects into your landing page
* Apply Linear's animations to your product showcase
* Use Notion's clean layout for a documentation site
* Transfer Glossier's brand feel to a client's skincare site
***
## 3. Refine Your Project
Click the **Design** button in the bottom-left to visually select and precisely edit UI elements.
Click any element to edit it directly
Just describe what you want. Step1.dev handles the rest.
Example: "Polish the UI—clean, modern, and intuitive, similar to Notion's style."
Upload images directly in the chat and describe how to use them. Step1.dev adds them to your project automatically.
Example: "Add this image as the homepage background."
Not happy with a recent change? Click the button at the top-right of the chat, or the `Restore code` button below any message, to go back to a previous version.
Not sure how to approach something? Switch to Ask Mode to get suggestions without changing anything in your project.
* Click the `Ask` button in the bottom-right of the chat
Example: "How can I add drag-and-drop to reschedule calendar events?"
***
## 4. Deploy & Publish
 Every time you make a change, Step1.dev **automatically deploys** your project—no manual action needed. Each version gets its own accessible link.
Click the button in the top-right to copy your project link and share it with clients or teammates.
The link always points to the latest version—no need to resend it after each update.
When your project is ready to share publicly, click the **Publish** button in the top-right corner to go live.
The published link does not update automatically with future changes—each time you want a new version to go live, click **Publish** again.
Connect your own domain so the site is accessible at your custom URL.
Click the settings icon in the top-right and go to the **Domain** tab.
Type in your domain and follow the on-screen setup instructions to complete the connection.
You can export your project at any time and deploy it to your own server or any cloud platform.
Click the button in the top-right to download the full project.
***
## 5. Learn More
Explore the three fusion modes and advanced techniques
Prompt best practices, debug tips, and Clone/Fusion techniques
Every time you make a change, Step1.dev **automatically deploys** your project—no manual action needed. Each version gets its own accessible link.
Click the button in the top-right to copy your project link and share it with clients or teammates.
The link always points to the latest version—no need to resend it after each update.
When your project is ready to share publicly, click the **Publish** button in the top-right corner to go live.
The published link does not update automatically with future changes—each time you want a new version to go live, click **Publish** again.
Connect your own domain so the site is accessible at your custom URL.
Click the settings icon in the top-right and go to the **Domain** tab.
Type in your domain and follow the on-screen setup instructions to complete the connection.
You can export your project at any time and deploy it to your own server or any cloud platform.
Click the button in the top-right to download the full project.
***
## 5. Learn More
Explore the three fusion modes and advanced techniques
Prompt best practices, debug tips, and Clone/Fusion techniques